
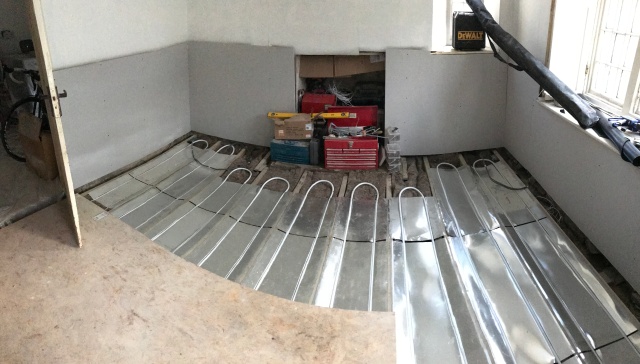
One point of irritation has been the complete lack of anything to stand on in the dining room. Seeing as it sits between the front door, utility and stairs, it’s almost impossible to move around the house without going through it. Thus, with the underfloor heating up and running it was possible to make strides towards protecting it (but not before mother-zilla stamped through one of the aluminium plates!).
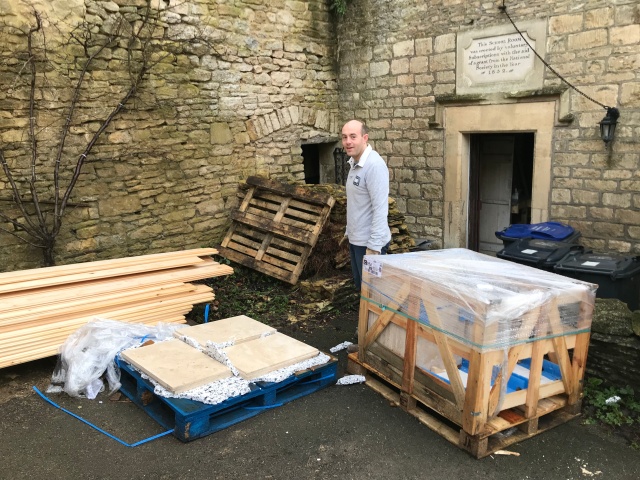
The boards had come in just before Ross’ visit in mid December, all 320 linear meters of it. Enough, it turned out, to deplete Travis Perkins’ stock from Chippenham to Cardiff. It arrived as usual on the back of a large truck with a hydraulic hoist, ready to deposit the goods on the drive. It only took a couple of attempts, the hoist slipping at the first attempt, shooting the lengths of soft timber erratically forwards. The driver was very blazé about this which was reassuring. The 15ft strips of wood were a little unwieldly to get into the Hall so they spent the nights covered (barely) by a couple of tarps, some meaty rocks and plenty of hope nobody in the vicinity also wanted lots of wood.
Sunday morning before cracking on with more tiles, Ross gave a hand in lumping them indoors and out of harm’s way. Thank you Ross! Typical guidance is to season wood indoors for a good two weeks before using it to allow for it to settle. A drafty old school hall with no central heating was not ideal but far better than being outside.
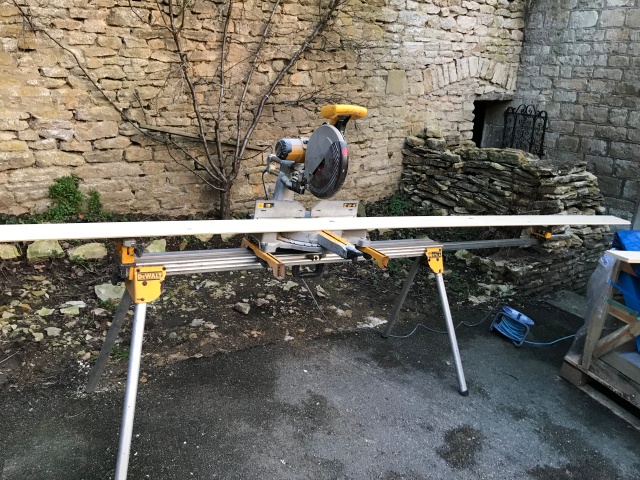
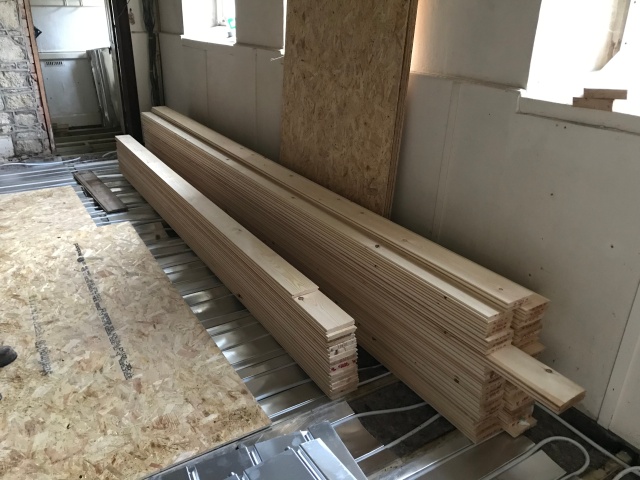
Roll forwards from December to the end of January, with the tiling all but done and the kitchen surfaces and second fix mainly done, and it was time to give floorboards a chance. Just to see what it was going to be like really. The mitre saw got to stretch its legs outside on the saw stand and bit into the soft white pine. One of the points of contention discussed with Ross was how to pattern the boards. Do you line up all the joins? Stagger them regularly? Try to make a random pattern of them? The splits in boards would also be accompanied by extra nails, which would also be a visible marker on the floor. Normally the length of the boards determines the pattern; the first board is either shorter than the room, in which case it goes straight down and the next board is cut to length to fill in the end. The second part of this second board is then the next board and the third board is used to complete that run. And so forth. Or the first board is too long and the offcut is used to start the second run. In this case, the 4.5m boards patterned exactly into the dining room such that the offcuts there would creat a repeating pattern on the floor. Typical! Beth said this was not on, so a pseudo-random cutting system was set up. Either way, by the end of the evening, there was a little flooring in place.
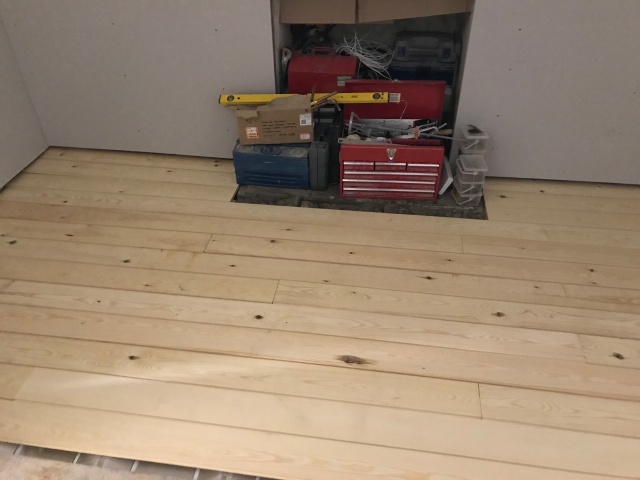
Just temporarily though, there weren’t any nails yet.
Fast forward some more stuff – like wiring, showers, underfloor heating, buying a car, lots of cycling, snow. It’s not like floors are important, not when you’ve got 4x8ft OSB sheets to throw around. Nevertheless, come March…
Nails had been calculated, sourced and ordered. Not just ordinary nails, these are old school nails. Cut nails, not round wire nails. Punched from sheets of steel. The nails go in pairs at every joist, so for 320m and joists every 0.4m you get 1600 nails. Add say 25% because you need four nails instead of two every time two boards meet and add an extra 10% because that’s what you do. Call it 2400 nails. You get about 160 nails per kilo which means you’re looking at a solid 15kg of nails.
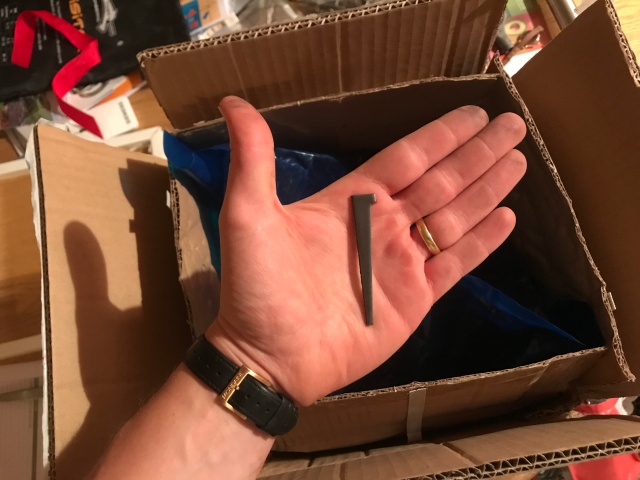
The box, only a foot squared, was surprisingly heavy when it arrived. And the nails were frighteningly big and blunt. The principle behind blunt brad nails is that a pointy nail pushes the wood aside which can cause it to split. These just bludgeon their way through, tearing fibres and generally not taking any prisoners. The torn and bent fibres get dragged down by the tapered shank and rough edges, making it unlikely the wood will ever relinquish its hold on the metal. In this case, for good measure and for annal-retentiveness, each nail would have a pilot hole drilled with a jig to ensure consistency.
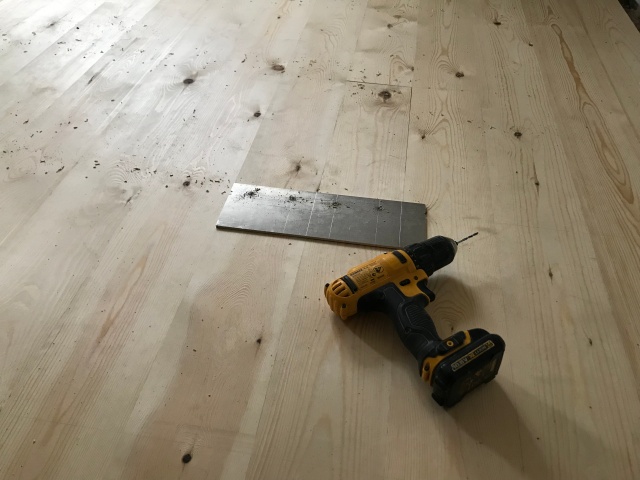
That’s how, mid March, lots of little holes were made then filled back up with metal. The rest of the boards had been cut quickly and some extra 3mm drill bits bought for good measure. Ever 5 boards or so you get your compression on. These boards are tongue and groove, which is good for things like stopping drafts, strength and consistency. The alternative being square sided planks which you just butt against each other. With square edged boards it’s really important to do the compression. It all comes down to the seasoning of the timber again. If you just plonk your boards next to each other and nail them down in the summer, come winter when the central heating kicks in all the boards shrink. Mainly by getting narrower, perpendicular to the grain. And bow. If you don’t have tongues inside grooves you end up with gaps which are going to let all the cold air rush in. Hence squishing the boards together, tongue and groove or not.
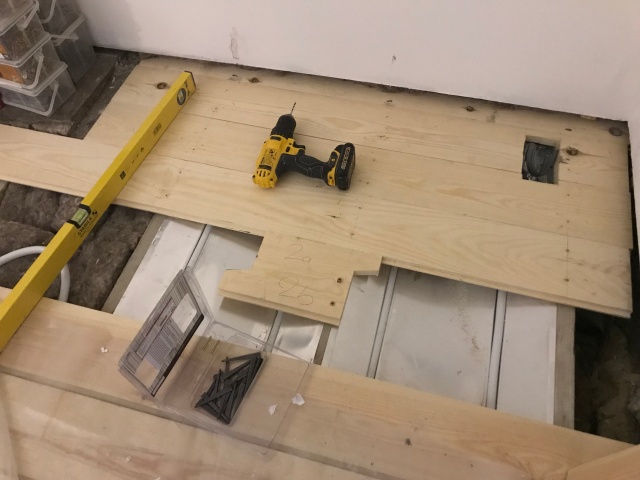
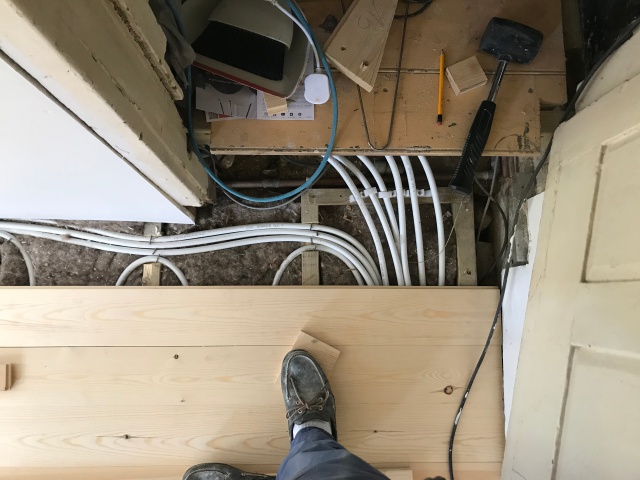
To do this you can buy a cool tool which grips onto a joist and screws out to push the boards, a bit like a backwards clamp. Sadly, with underfloor heating obscuring the joists you can’t use these. The alternative is to make a pair of wedges. You screw one side to the top of the joist and smack the other side up the angled face to compress the boards. It’s not quick, it bends the screws, but it does work. Ideally you’d have a wedge pair every couple of joists for evenness, but that was going to be a lot of work. Using a couple looks to have worked out for now anyway.
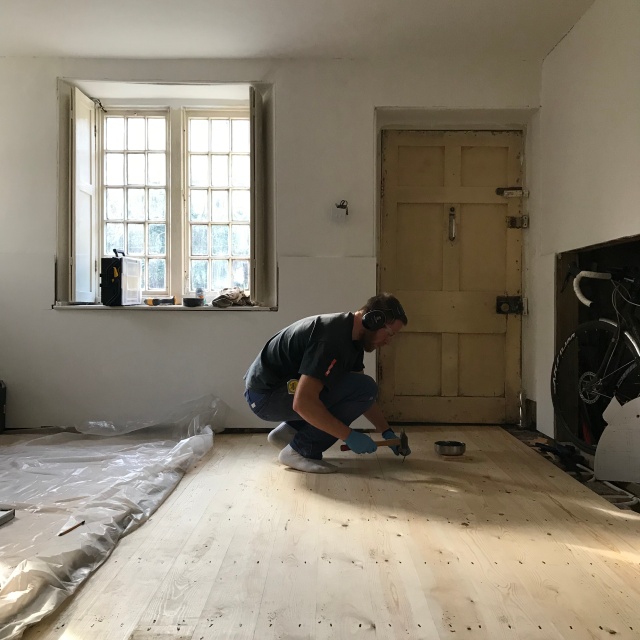
With the edges compressing the boards together with the kind of mechanical advantage only a mechanics lecturer can dream about, you’re ready to drill and nail the boards. And repeat. Every five boards. The fun doesn’t end there though. For once the nail has been bashed, it must be bashed further, below the surface of the wood. After all, nobody wants to stand on nails, heads or otherwise. Thus, each nail must be revisited with a nail punch, a small flattened spike used to hit the top of the head only and not the surrounding wood, in order to drive it sub-flush. Doing this also saves your sheets of sandpaper when you come to sanding the floor.
By the evening and with a lot of care around where the underfloor heating pipes crossed the joists, there was a floor. A lovely smooth expanse of pale virgin pine, regularly and evenly punctuated by small black-grey full stops of iron tying the whole floor structure together.
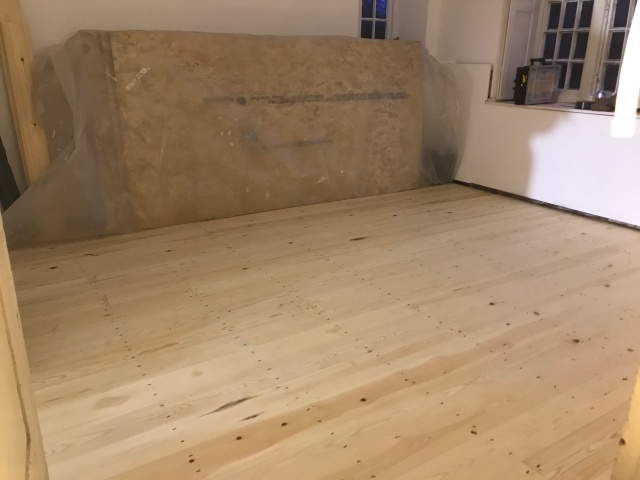
Then it was covered in thick plastic sheets for finishing another day, possibly one of the saddest parts of this renovation. Very much the mayfly of the house. The ability to walk over the whole floor is still novel.
To those with an interest and who notice these things, you may observe the use of ear defenders. Whereas it’s certainly possible to work it out, nail insertions were not counted. But there were hundreds. And at about five strikes each, plus another three for the subsequent punching, tinnitus set in promptly. Also, pliers were used to grip the nails because sooner or later you’re going to miss. they also help line up the heads and stop the nails twisting.

Impressed, as ever. Mother-zilla x
LikeLike